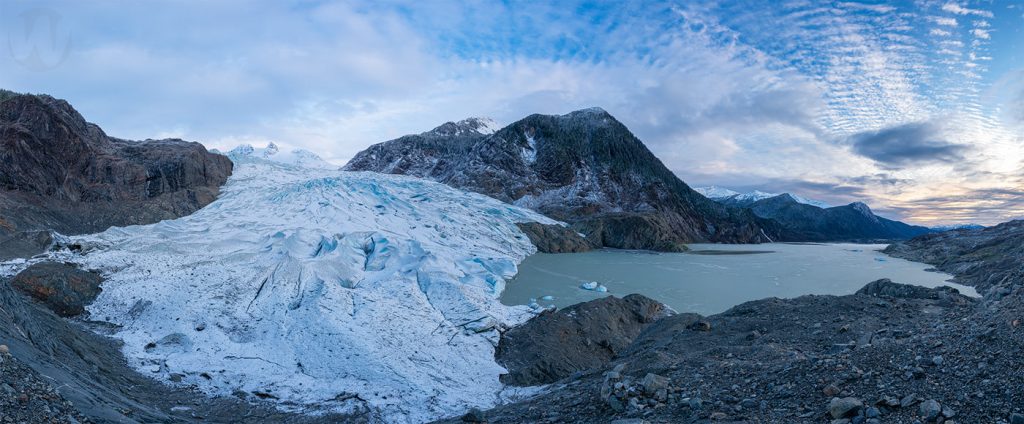
The Mendenhall Glacier hike is one of my favorites in Juneau, Alaska. This 3.5 mile one-way hike will bring you face to face with one of natures most amazing phenomena, a glacier. It’s possible to walk on top (if you’re properly equipped) or even explore an ice cave once you get there. It’s an awesome experience that’s well worth your time in either types of sun, shiny and liquid.
There are 2 tracks that will get you to the face of the glacier. I refer to them as the upper trail and the lower trail because I’m really creative. Either way, you want to start your trek at the West Glacier Trailhead. There is an East Glacier loop near the visitors center that is a fun hike, but it will not bring you to the glacier.
Ample parking and a 6 berth outhouse station are available at the trailhead for all of your giving back to nature needs. There are no other facilities at all along the trail so if you need to go, now is the time. You will find a number of streams and different water sources along the way if you have a water filter and would rather not haul a full bottle of water. Always filter any water that you come across on the hike. There be bears and deer and mountain goats that totally supply some of the water you see. I usually just take a Sawyer water filter with a 1 liter bag attached that I fill and drink as needed.
Free GPX Track of the Mendenhall Glacier Hike
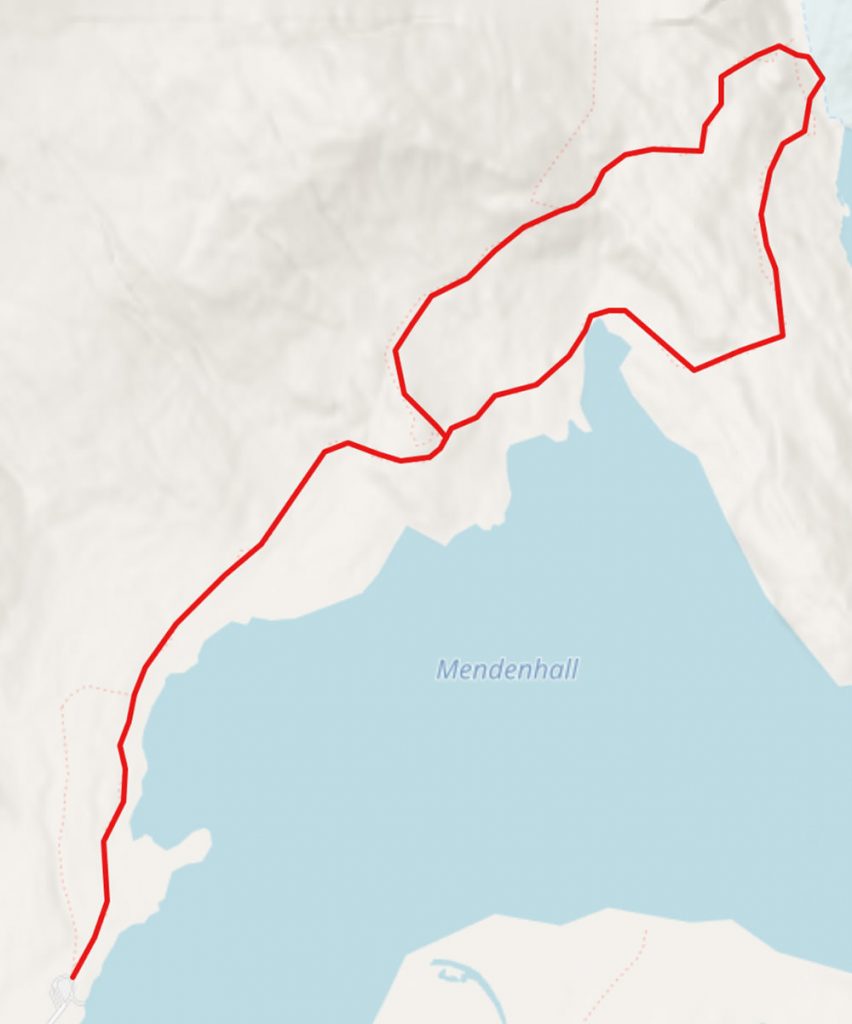
The first 1.2 miles of the hike is relatively flat and a good warm-up for the rest of the trail. I frequently ride a mountain bike on this first section since it’s way more fun to coast back to the parking lot after a long hike. I’m definitely in the minority, but it’s a fun ride.
The start of the uphill section is right after you cross the last bridge (I think it’s the 5th one). If you’re taking the upper trail, there is a bypass that’s not marked. As soon as you cross the bridge, take a left and follow the stream. It is much more uphill than the standard trail, but it does shave off about 1/4-1/2 mile of hiking. If you’re taking the lower trail, don’t take the bypass. Continue on to the first switchback and hike another 1/4 mile.
Lower Trail
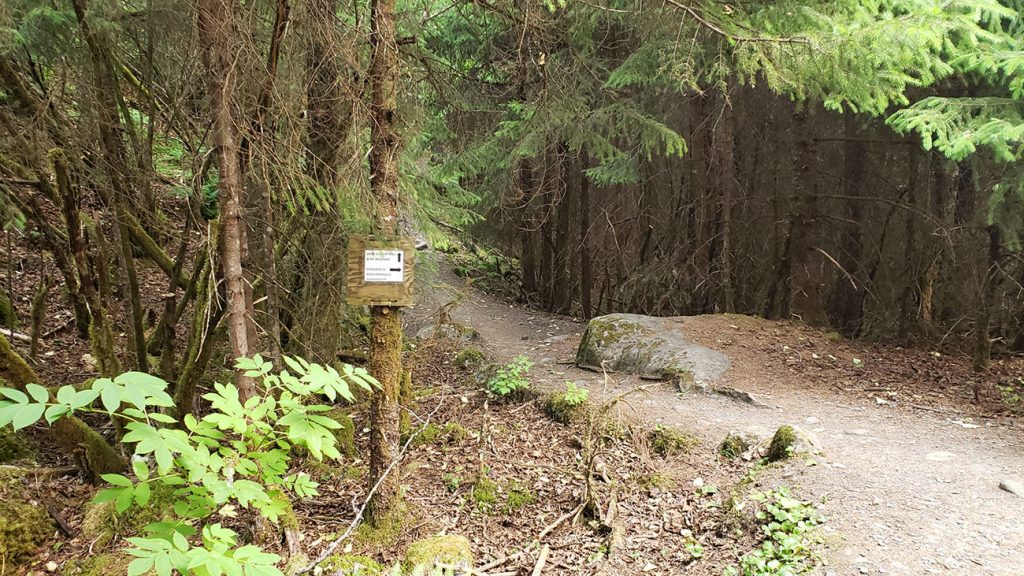
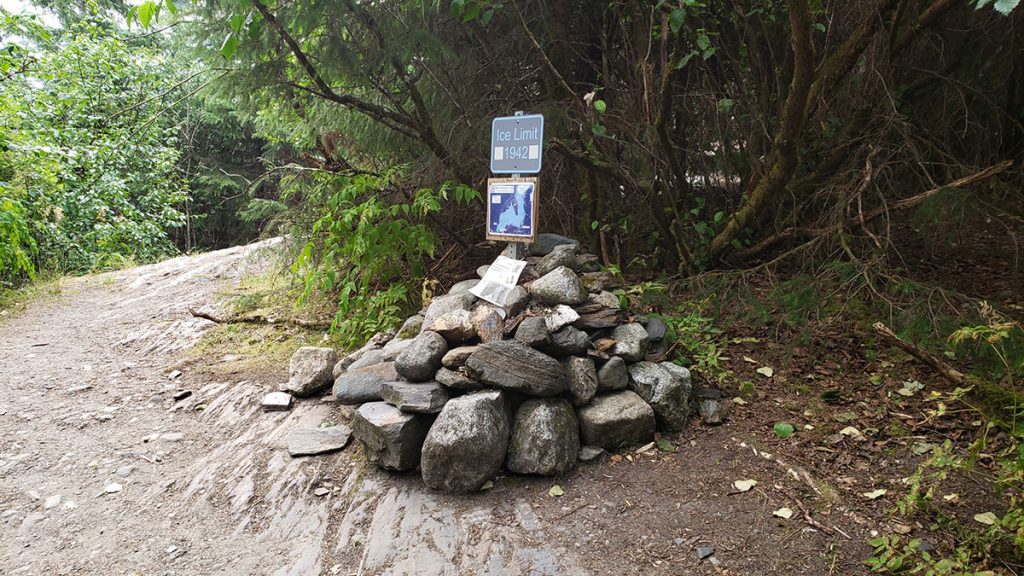
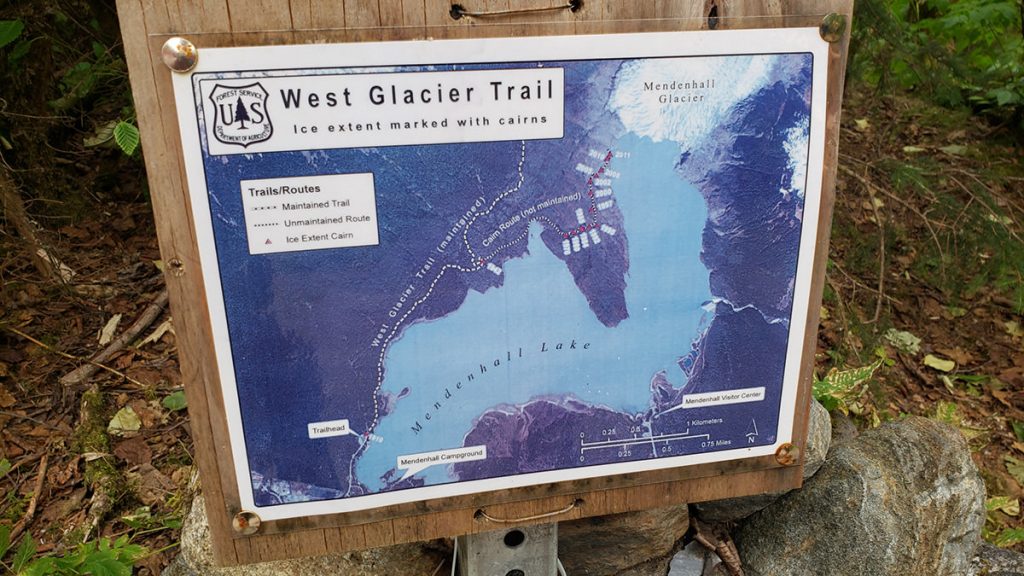
There is sometimes a sign where the lower trail spur is. However, I’ve seen it come and go quite frequently, so don’t expect to see this. At this point, if you look to your right, you will see a 1942 ice limit sign. It has a bunch of rocks below it and a small map. If you walk to the sign and turn around, you will see a trail that goes down. That’s the spur for the lower trail.
The sign says that this route is not maintained, and it’s not. However, it’s used by most people now so the sheer volume of traffic keeps it in really decent shape. It’s generally pretty easy to follow, though there are a couple turns that are possible to miss if you’re not paying attention. It’s really not that difficult, but if you’re concerned at all, download the GPS track to Gaia (or something similar) and check your route against that from time to time.
The Climb
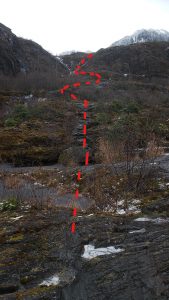
About halfway to the glacier you will come across a short, steep(ish) rock climb that you will have to navigate. In the picture below, you will see the route that leads up to it. I only mention this since the first time I did the lower trail, I missed this climb and came down the face on the right. Definitely not the way to go.
Thankfully the dog we had at the time was part mountain goat. I was hanging on by my fingertips at a couple spots and she just bounded down and tried to pass me. I had to grab her harness at one point and lower her down to make sure she didn’t overestimate her skills. This was a bit challenging since she weighed close to 90 pounds.
The rock climb itself isn’t too much of a challenge if you take your time. I’ve taken numerous people up this section that weren’t the strongest of climbers and they did it with no issue. Coming down is where most people get scared. If you’re going to do this hike in the winter, from this section to the glacier is the iciest part of the trek. Having some sort of grip is quite helpful, the favorite of most people up here would be microspikes if you’re not into carrying full crampons (which are quite helpful on the glacier itself).
Watching the Mendenhall Glacier Retreat
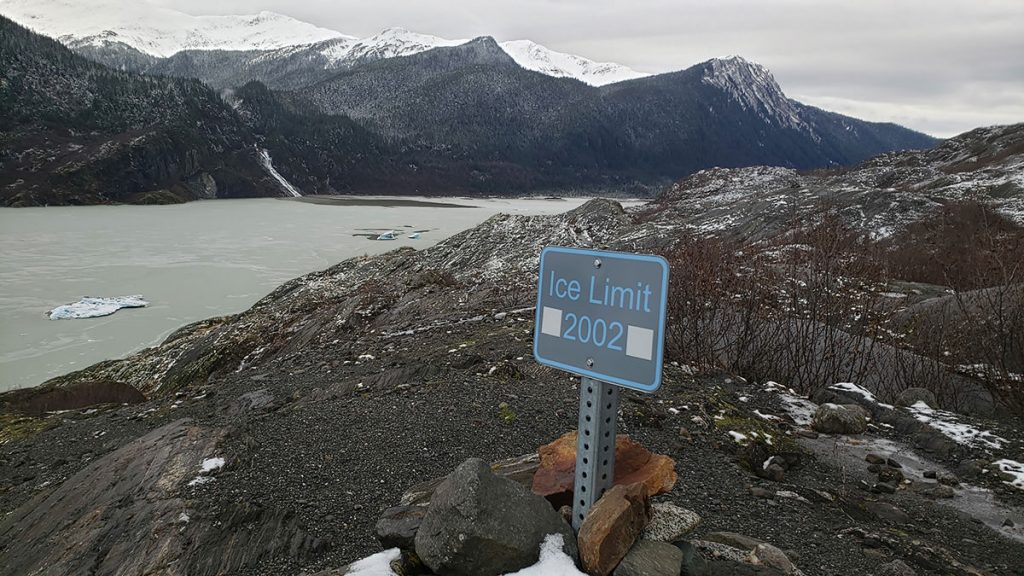
The lower trail of the Mendenhall Glacier hike offers a unique experience, seeing how the glacier has been retreating over the years. The Forest Service has installed ice limit signs every couple of years. It’s quite interesting, and sad, to see how fast the glacier has been retreating. Everywhere you step on this hike was once covered by ice. You more or less just walk from sign to sign until you get to the glacier.
During the summer there is a section of the peninsula that is roped off. This area is a nesting area for birds and you should avoid it. The trails stays much higher on the rocks so there’s no need to disturb the wildlife.
The Glacier
The Mendenhall Glacier hike will take you a minimum of 1 hour. It will most likely take closer to 1.5 – 2 hours of solid hiking. At the face of the glacier, you can stop and take a lunch break and enjoy the view. You can totally go searching for an ice cave. If you’ve brought some crampons, feel free to go for a walk on the ice.
I would strongly recommend not walking on the glacier without something on your shoes. Glacier ice is extremely slippery at all times. If you slip and start to slide, you will not be able to stop yourself until you hit something. I don’t care how strong your fingers are, they will not have any grip on glacier ice. Some of the crevasses are shallow, some can be hundreds of feet deep.
A few years back, Qale took his kids up to the glacier so they could see the ice. While they were walking, his daughter slipped and as soon as she started sliding, she couldn’t stop. She ended up at the bottom of a crevasse and he had no way to get her out. This put him in a bit of a pickle since this was back before everyone had a cell phone. He needed to run back to the visitors center to get help, but didn’t want to leave her alone. He left his 5 year old son at the top and told him to keep talking to her while he was gone. Search and Rescue got her out safely and she ended up being totally fine. Don’t be like Qale.
The Upper Trail of the Mendenhall Glacier Hike
If you took the lower trail to the glacier, take the same way back. It’s not worth the effort of trying to find the upper trail if you’ve never done it. Plus, the section closest to the glacier is the worst part of this hike. You have to climb straight up the scree (mixture of mud, rock and dirt) which is never fun. The only time it’s bearable is the dead of winter when the hillside freezes over.
Why take the upper trail at all? A few years ago, the glacier was much higher on the hillside than it is now. At that point, the upper trail dropped you down on the edge of the glacier and had perfect access to the ice caves of the time. Now, I really prefer the lower trail due to the scree issue.
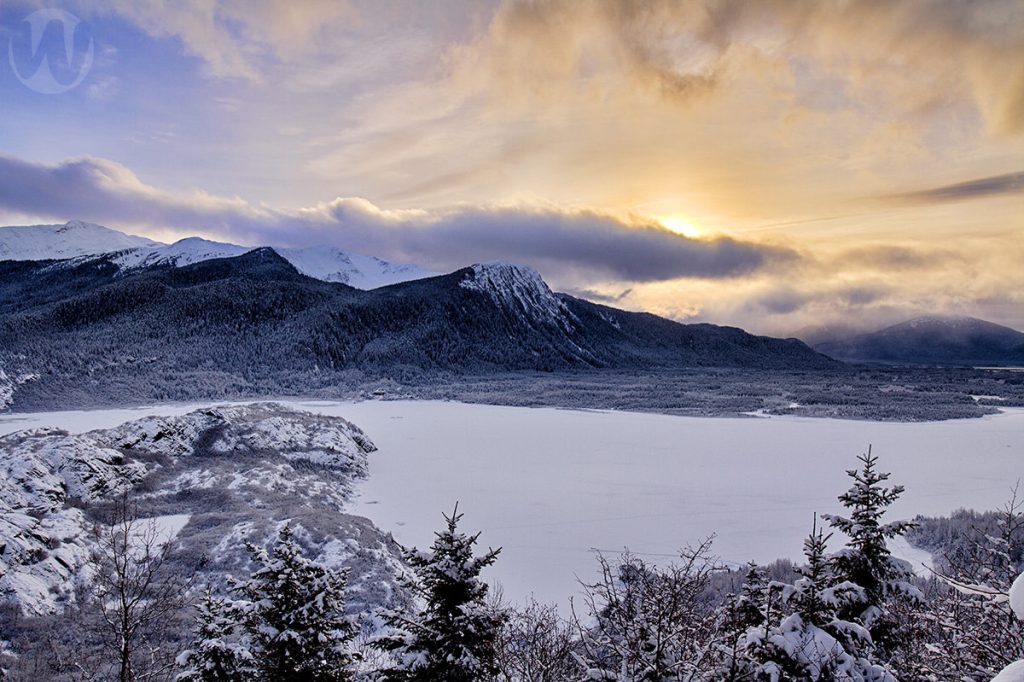
Anyway, if you want to take the upper trail, just follow the main trail instead of the spur listed above. You will have significantly more elevation gain going this route, but that does lead to some great views along the way. After some steady climbing, you will reach a point where it’s quite a bit steeper. There are stone steps and a guardrail (if that’s what you call metal rope). At the end of this steep section, you will have the above viewpoint. It’s awesome.
Time to drop back down
I want to point out the above viewpoint again since it’s the sign that you need to jump off the main trail. Right after this view, you will climb down a small boulder then walk along the trail to a sharp switchback. If you’re taking West Glacier all the way to the end, you would continue up. If you’re trying to get to the glacier face, you need to go down to the right. Many people miss this jumping off point since it’s not really marked. There was a sign there for a while, but it comes and goes so don’t expect that.
This section of the upper trail is not very well maintained. It looks (and feels) like someone bushwhacked their way through. You will see some flags in the trees from time to time to let you know that you’re on the right path. The brush is generally thick up here, so it’s hard to get too far off the beaten path.
You will cross a couple streams along this route. There is a wooden bridge someone created out of some 2×4’s across one of them. My dog always freaked out crossing this one. Especially when it was icy.
Eventually you will pop out at the top of the scree area and look down on the glacier. Due to the constantly shifting mud and rock here, there’s no defined trail down to the ice. I personally cut back to the right and make my way down under the massive rock wall there. I’ve found it to be a bit less slick, but that’s always changing.
The upper trail will take a minimum of 1h20m. That’s my best time and I was rushing. It will probably be over 2 hours if you hike at a normal pace and stop along the way to enjoy the view.
The Mendenhall Glacier Hike is an awesome trek. Take your time and enjoy your trip to Juneau, Alaska!
Leave a Reply