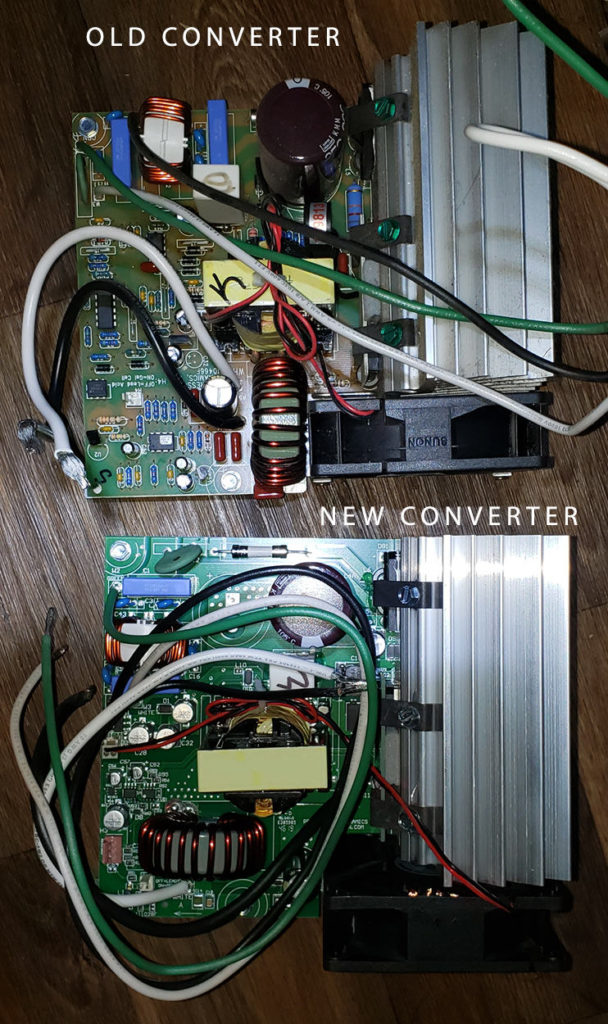
Do you want to hear the most annoying sound? Plug in your camper with a squealing power converter. It would send a banshee crying like a baby back to it’s nest cursing the sky. The same sky where a ring wraith would give back the ring of power in the hopes that it would stop the incessant squeal.
Now that I think about it, there is a ring on the power converter and it’s possible that it was crying out for it’s master. A careful inspection didn’t turn up any writing, but then again, my muggle mind doesn’t necessarily test everything by throwing it in the fire. I really need to start doing proper testing before I throw things in the trash. Could have been onto something that would have let me rule the world…
You’d think that a newer camper wouldn’t have these problems, but you’d be wrong. After our adventure getting to Washington, we heard the cry of the one ring. I fell asleep and had some bad dreams. When I awoke, my wife looked…like she hadn’t slept much. The following night I found that I could flip the breaker to the power converter and the sound stopped! We slept well, but our batteries would not be getting charged when we are plugged in. Since we spend a fair amount of time boondocking, we really need our batteries charged whenever we have the chance to plug in.
The power converter installed in our Adventurer camper is from Progressive Dynamics. After a quick search online, I found that other people have had the same problem.
The best find, it would be covered under warranty!
I called the support number and it was a very quick and easy process to get a replacement part in the mail. All you need is the serial number off the old power converter (location is shown below).
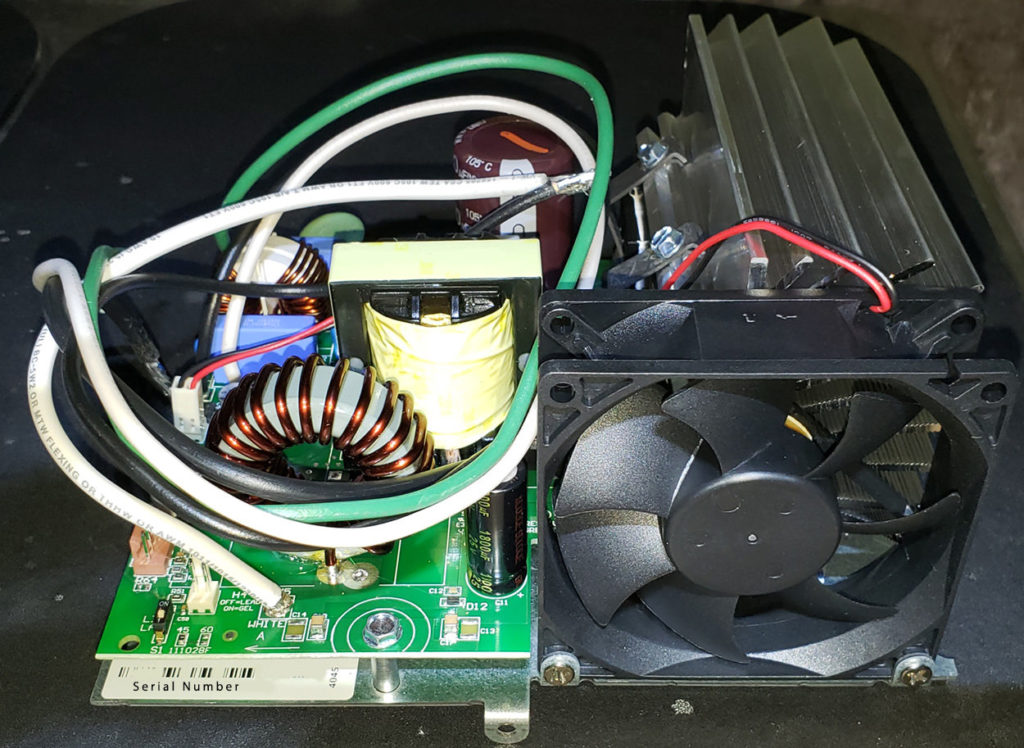
Here’s how I replaced my squealing power converter
1. Turn off ALL Power to your camper
This step might be pretty obvious to most people, but Qale has been known to skip this step when he’s being lazy (or turned off the wrong circuit when attempting to kill only part of the power supply). One time he was replacing a dishwasher and almost set the kitchen on fire because the wrong circuit was turned off and sparks really do fly when wires cross at the wrong spot…under a dishwasher… So don’t be like Qale. Just kill all the power and save yourself the excitement. That means disconnecting shore power, but also pulling the battery disconnect switch.
2. Remove Screw in middle of Panel
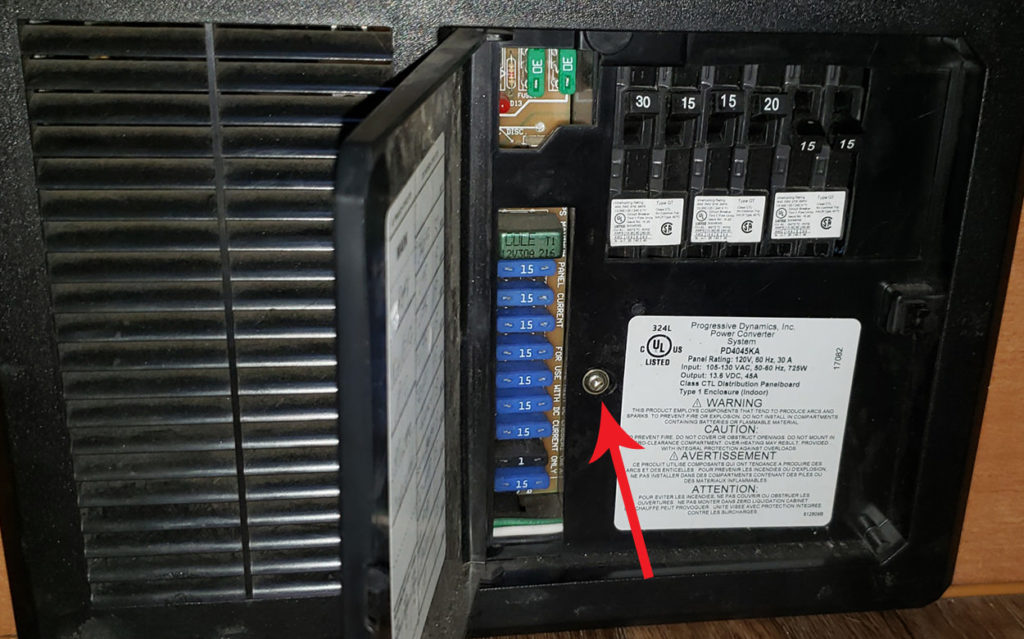
There is only one screw holding the panel on. For you neophytes, that means you only need to unscrew the screw that the arrow is pointing to. The rest of the panel is held on by some tabs that unclick as you pull on them (4 in my case). Don’t get too aggressive with your yanking to remove it, but you will need a little oomph to get it off.
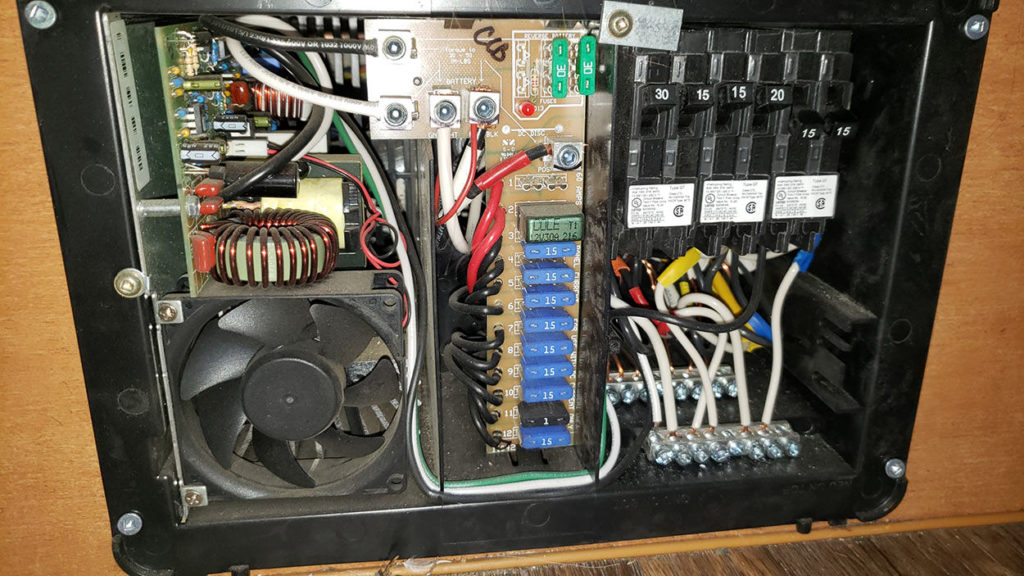
3. Check that Power is Off
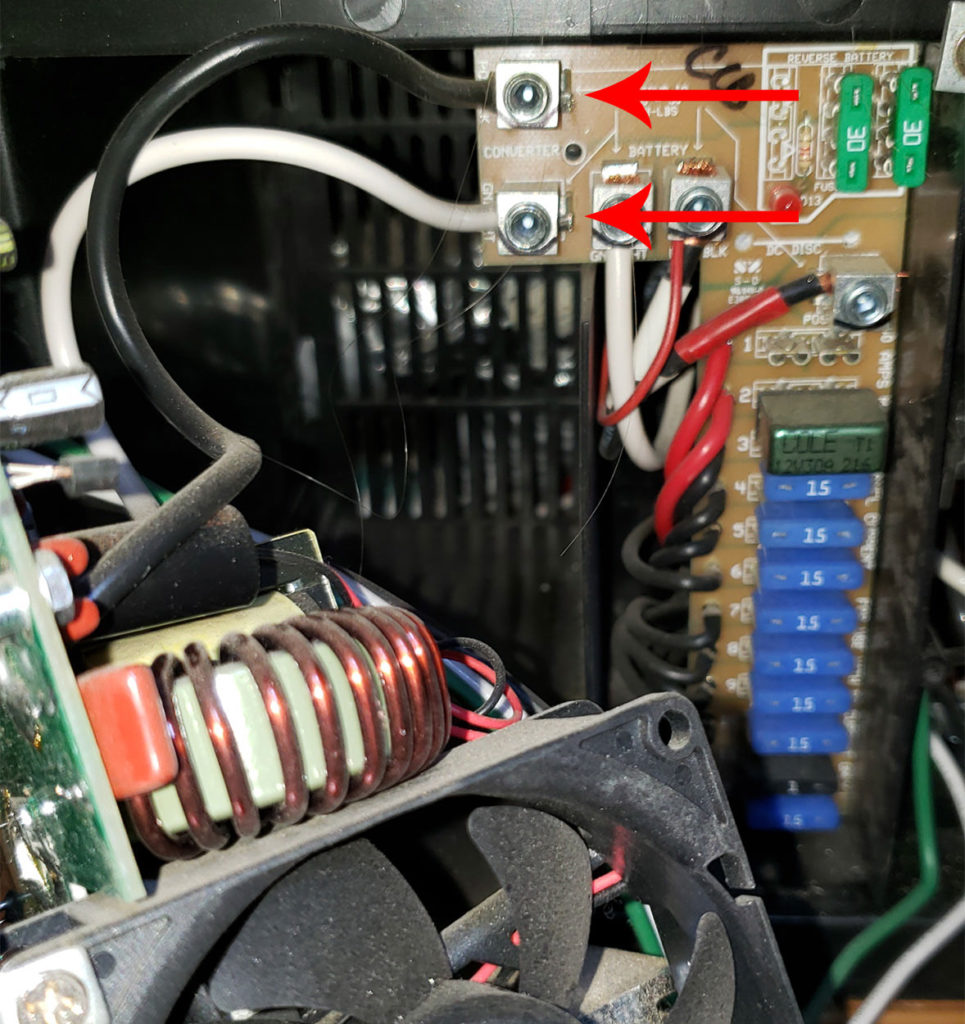
Just to cover my behind…use a multimeter to verify that power has indeed been turned off to your unit. Just touch the above two spots with the 2 leads and make sure it isn’t reading anywhere near 12V. If it is, repeat step #1 above.
4. Unscrew Power Converter
There is 1 screw holding the Power Converter to the rest of the unit. It’s on the left and you shouldn’t have any problem getting that off.
5. Pull Winnie the Poo out of the Tree
I chose to pull the converter out before attacking the wires. It’s personal preference, but I like to double check that I’m only disconnecting the necessary wires. Reach in and give Winnie a good tug. Be careful that you’re not stressing any wires that aren’t connected to the device.
6. Disconnect the 5 Wires Attached to the Power Converter
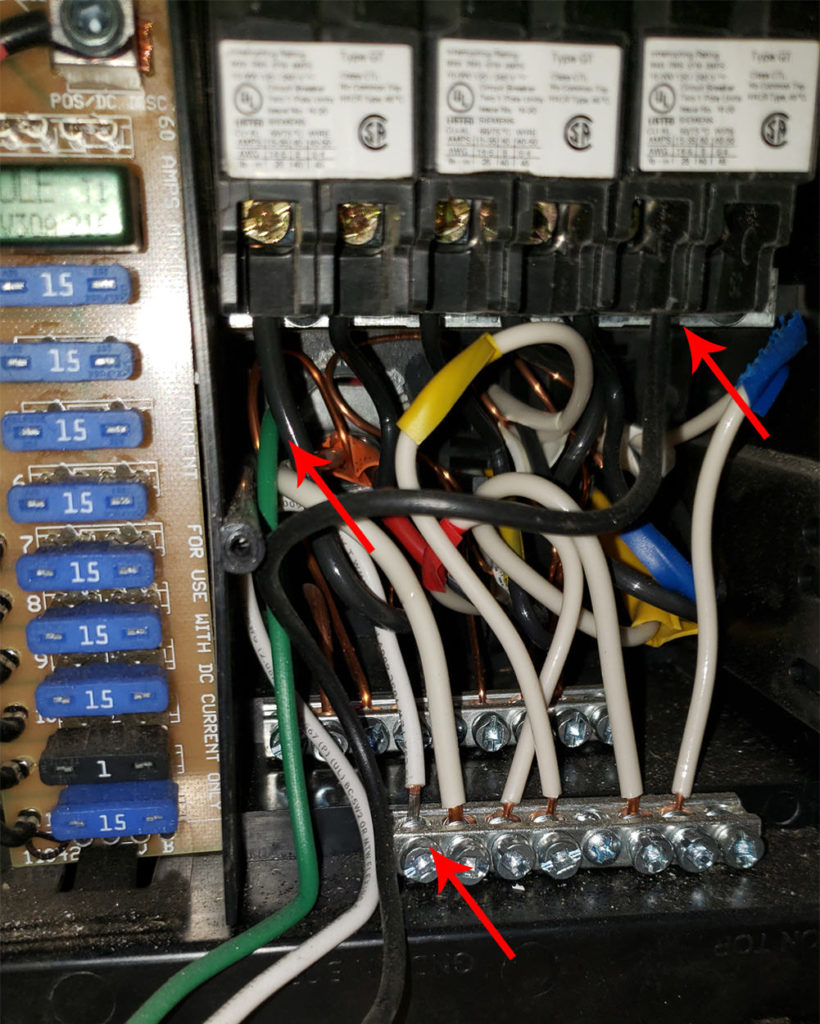
In addition to the Black & White wires you tested for voltage, you have 3 wires that need to be disconnected on the breaker side of the panel. Nothing super difficult, but be sure to take a picture so that you plug in your new wires in the same spots. I had a difficult time getting the black wire out of the breaker switch so I did pull the breaker out to get easier access. Just pull it from the bottom and it should pop off the rail pretty easy.
7. Reverse the Process
At this point, your old converter should be sitting idly by, waiting for a trip to wherever old things go. Reverse the process and connect your new power converter. Once all the wires are connected properly, carefully insert the new converter while watching for wire runs. It should look very similar to how your old one did when inserted. Screw back in the holding screws and you should be good to go! Obviously at this point it’s best to turn on your power and verify that you are charging your house batteries and the squeal of death is gone.
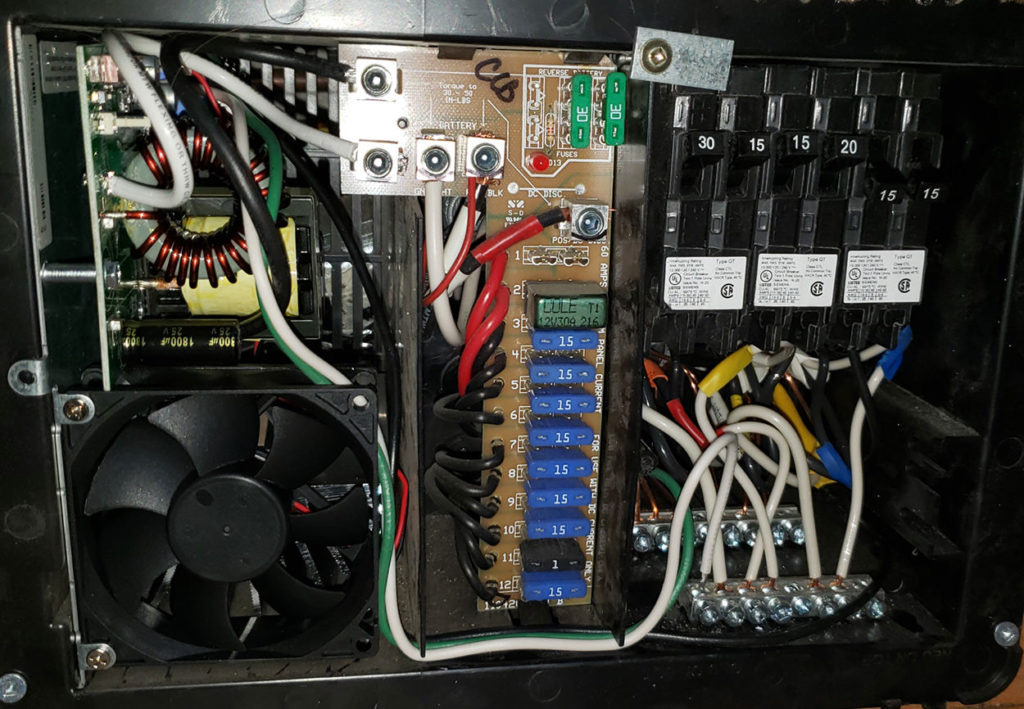
Enjoy Your Sleep Again!
Replacing a squealing power converter isn’t that difficult. It’s even nicer when it’s free! Our camper itself was out of warranty, but the cool thing is that individual parts often have their own warranty rules. It never hurts to contact the company who made the part and see what they can do when things aren’t working how they should. Today my wife broke off the kitchen faucet…I doubt I can warranty that one out for free.
Leave a Reply